
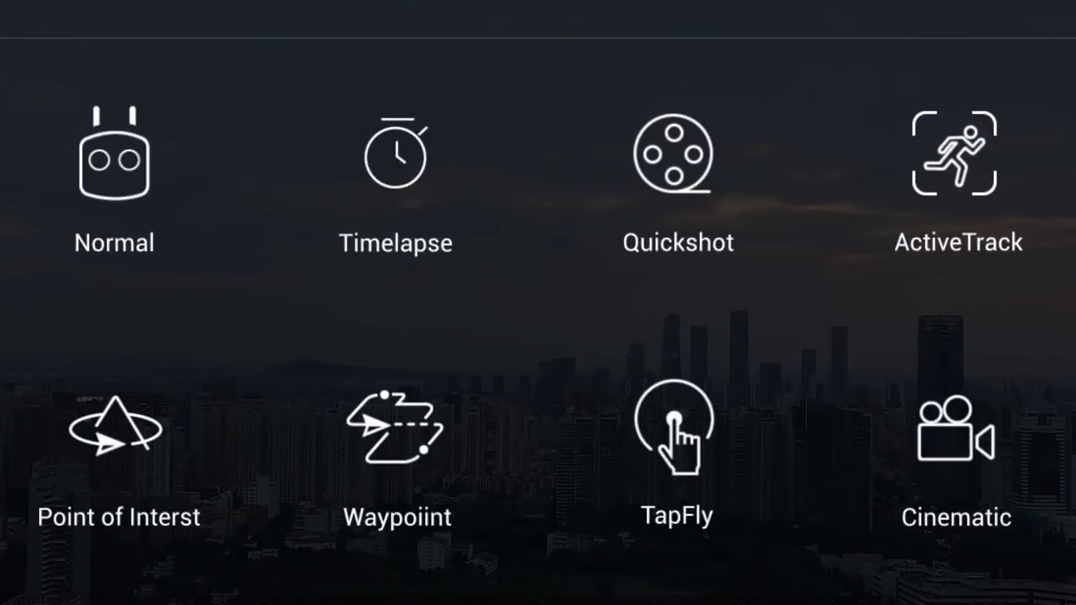
Overview of the DJI Intelligent Flight Modes
The DJI Drones supports Intelligent Flight Modes including Hyperlapse, QuickShots, ActiveTrack, Point of Interest, Waypoint (coming soon), TapFly, and Cinematic Mode. Select an Intelligent Flight Mode in DJI GO 4. Ensure the battery level is sufficient and the aircraft is working on P-mode (Positioning) when using the Intelligent Flight Modes.
Hyperlapse
For the Hyperlapse feature to work, take off the and position it the where you want your Hyperlapse to start.
- Click the remote controller on the left-hand side of the screen.
- Select “Timelapse”.
- Select the type of Timelapse you would like to complete. Then select the interval and select “Go” this will start your Hyperlapse
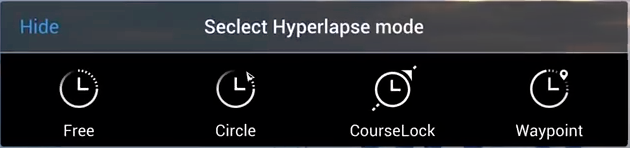
Hyperlapse shooting modes include Free, Circle, Course Lock, and Waypoint.
Free
The aircraft automatically takes photos and generates a timelapse video. Free mode can be used while the aircraft is on the ground. After takeoff, control the aircraft’s altitude, flight speed, and gimbal angle using the remote controller. Hold the control sticks and accelerate at a steady speed for two seconds and then press the C1 button. The speed is fixed and the aircraft continues to travel at that speed while taking photos. The orientation of the aircraft can still be controlled during this time. Follow the steps below to use Free:
1. Set the interval time and video duration. The screen displays the number of photos that will be taken and how long the shooting time will be.
2. Tap the shutter button to begin.
Circle
The aircraft automatically takes photos while flying around the selected subject to generate a timelapse video. Circle can be selected to travel in either a clockwise or counter-clockwise direction. Please note that the aircraft exits from Circle if any command from the remote controller is received. Follow the steps below
to use Circle:
1. Set the interval time and video duration. The screen displays the number of photos that will be taken and how long the shooting time will be.
2. Select a subject on the screen.
3. Tap the shutter button to begin.
CourseLock
With the DJI Drone, Course Lock can be used in two ways. In the first way, the orientation of the aircraft is fixed, but a subject cannot be selected. In the second way, the orientation of the aircraft is fixed and the aircraft flies around a selected object. Follow the steps below to use Course Lock:
1. Set the interval time and video duration. The screen displays the number of photos that will be taken and how long the shooting time will be.
2. Set a flight direction.
3. Select a subject (if applicable).
4. Tap the shutter button to begin
Waypoint
The aircraft automatically takes photos on a flight path of two to five waypoints and generates a timelapse video. The aircraft can fly in order from waypoint No. 1 to No. 5 or No. 5 to No. 1. Please note that the aircraft exits from Waypoints if any command from the remote controller is received. Follow the steps below to use Waypoint.
1. Set the desired waypoints and the lens direction.
2. Set the interval time and video duration. The screen displays the number of photos that will be taken and how long the shooting time will be.
3. Tap the shutter button to begin.
The aircraft will generate a timelapse video with resolution of 1080p25 automatically, which is viewable in the Playback menu. You can select to save the JPEG or RAW format footage and to store the footage in built-in storage or SD card in the camera settings.
- For optimal performance, it is recommended to use Hyperlapse at an altitude higher than 50 m and to set a difference of at least two seconds between the interval time and shutter..
- It is recommended to select a static subject (e.g., high-rise buildings, mountainous terrain) at a safe distance from the aircraft (further than 15 m). Do not select a subject that is too near the aircraft.
- The aircraft brakes and hovers in place if an obstacle is detected during Hyperlapse.
- The aircraft only generates a video if it has taken at least 25 photos, which is the amount required to generate a 1-second video. The video generates when a command is given from the remote controller or if the mode is exited unexpectedly (such as when the low battery RTH is triggered)
QuickShots
QuickShot shooting modes include Dronie, Circle, Helix, Rocket, Boomerang, Asteroid, and Dolly Zoom (only available with Mavic 2 Zoom). The DJI Drone records a video according to the selected shooting mode and then automatically generates a 10-second video. The video can then be viewed, edited, or shared to social media from Playback.
Dronie: The aircraft flies backward and ascends, with the camera locked on the subject.
Circle: The aircraft circles around the subject.
Helix: The aircraft ascends and spirals around the subject.
Rocket: The aircraft ascends with the camera pointing downward.
Boomerang: The aircraft flies around the subject in an oval path, ascending as it flies away from its starting point and descending as it flies back. The aircraft’s starting point forms one end of the oval’s long axis, while the other end of its long axis is at the opposite side of the subject from the starting point.
Ensure there is sufficient space when using Boomerang: Allow a radius of at least 30 m around the aircraft and allow at least 10 m above the aircraft.
Asteroid: The aircraft flies backward and upward and then takes several photos, then flies back to its starting point. The video generated starts with a panorama of the highest position and then shows the descent. Ensure there is sufficient space when using Asteroid: Allow at least 40 m
behind and 50 m above the aircraft.
Dolly Zoom: The Mavic 2 Zoom flies backward and upward. It adjusts the zoom during flight to keep the selected subject the same while the background changes.
When planning to use Dolly Zoom, first select the distance between the aircraft and subject. Be sure that there is at least three times that distance available on the rear side of the aircraft so that there is sufficient space to fly
Using QuickShots
Ensure that the aircraft is in P-mode and that the Intelligent Flight Battery is sufficiently charged.
Follow the steps below to use QuickShots:
Take off and hover at least 2 m above the ground
In DJI GO 4, tap , then select QuickShots and follow the prompts
Select your target subject in Camera View (tap the circle on the subject or drag a box around the subject) and choose a shooting mode.
Tap “GO” to begin recording. The aircraft flies back to its original position once shooting is finished.
Tap to access the video
Exiting QuickShots
Toggle the Flight Mode switch to S-mode or T-mode to exit QuickShots anytime during shooting (when Multiple Flight Modes is enabled in the DJI GO 4 app). Press the Flight Pause button on the remote controller or tap in DJI GO 4 or for the emergency brake.
ActiveTrack
ActiveTrack allows you to select an object on your mobile device screen. The aircraft adjusts its flight to track the subject. No external tracking device is required. Mavic 2 Pro/Zoom can automatically identify up to 16 objects and uses different tracking strategies to track people, vehicles, and boats.
Using ActiveTrack
Ensure that the aircraft is in P-mode and that the Intelligent Flight Battery is sufficiently charged. Follow the steps below to use ActiveTrack:
1. Take off and hover at least 6.6 ft (2 m) above the ground.
2. In DJI GO 4, tap , then select ActiveTrack
3. For optimal performance, it is recommended to select a subject that is automatically recognized by the aircraft. To do so, select a subject that has been recognized onscreen and tap to confirm your selection. If the desired subject has not been recognized by the aircraft, drag a selection around it onscreen and tap to select it manually. When the subject is selected manually, however, the ability of the aircraft to track the subject may be affected. If the box turns red, the object cannot be identified and it needs to be selected again.
4. The aircraft automatically avoids obstacles in its flight path. If the aircraft loses track of the subject because it is moving too fast or is obscured, re-select the subject to resume tracking
ActiveTrack includes the following sub-modes:
Trace
The aircraft tracks the subject at a constant distance. Use the roll stick and tilt stick on the remote controller to change the distance, and use the slider in DJI GO 4 to fly in a circle around the subject. The framing of the subject is adjusted using the left stick and gimbal dial. When detecting an obstacle in this sub-mode, the aircraft will behave as follows:
1. If any action is performed on the remote controller after an obstacle is detected, the aircraft brakes and hovers in place.
2. If no action is taken, the aircraft tries to avoid the obstacle
Parallel
The aircraft tracks the subject at a constant angle and distance from the front and side. Use the roll stick on the remote control to fly in a circle around the subject.
The framing of the subject is adjusted using the left stick and gimbal dial. In this sub-mode, the aircraft brakes and hovers in place once an obstacle is detected.
Spotlight
The aircraft does not track a subject automatically, but keeps the camera pointed in the direction of the subject during flight. The remote controller is used to maneuver
the aircraft, but control of orientation is disabled. The framing of the subject is adjusted using the left stick and gimbal dial. The aircraft brakes immediately when an
obstacle is detected in this sub-mode.
Exiting ActiveTrack
Press the Flight Pause button on the remote controller to brake immediately. Tap on the screen or toggle the Flight Mode switch to S-mode on the remote controller to exit ActiveTrack. After exiting ActiveTrack, the aircraft hovers in place, at which point you may choose to fly manually, track another subject, or return to home.
Point of Interest
Select a static subject as the Point of Interest. Set the circle radius, flight altitude, and flight speed. The aircraft flies around the subject according to these settings. DJI Drones supports selecting the POI through GPS positioning and selecting on the screen directly.
1. Select POI on the screen: drag a box around the desired subject and tap the “GO” icon on the screen. The aircraft starts to measure the location of the subject and flies around the subject once it measures the location successfully. Use the gimbal dial to adjust the subject framing. The circle radius, flight altitude, and flight speed can also be adjusted during flight.
2. Select a subject through GPS positioning: Manually fly the aircraft above the subject, and then press the C1 button or select in DJI GO 4 to confirm the subject. Fly the aircraft at least 5 m away from the Point of Interest. The flight speed and the circle direction can be set in DJI GO 4. Tap “GO” to start flying. Use the gimbal dial to adjust the subject framing. The circle radius, flight altitude, and flight speed can also be adjusted during flight.
Flight Parameter Settings
1. Flight Speed: Flight speed range is 0-10 m/s, the “+” value means the aircraft circles the point counter-clockwise, and the “–” value means the aircraft circles the point clockwise. Adjust the speed by sliding the onscreen slider, and use the roll stick on the remote controller to increase the value.
2. Circle Radius: Adjust the radius by sliding the onscreen slider, and use the tilt stick on the remote controller to increase the value.
3. Circle Attitude: Adjust the attitude by sliding the onscreen slider, and use the throttle stick on the remote controller to increase the value.
4. Gimbal Angle: Use the yaw stick to control the gimbal’s yaw, and use the gimbal dial to control the gimbal’s tilt. Tap the icon to recenter the gimbal (If GPS Positioning is used to select the Point of Interest, only the yaw recenters. If the Point of Interest is selected on the screen, both the yaw and tilt recenter).
5. Circle Direction: Select the direction by sliding the onscreen button.
Exiting Point of Interest
Tap on the screen or press the Flight Pause button to pause the Point of Interest mode. Press and hold on the Flight Pause button to exit Point of Interest mode.
Waypoints
The aircraft flies to the waypoints in order according to the settings. The flight orientation and speed can be controlled during flight. You can select the waypoints by flying the Mavic 2 Pro/Zoom to the waypoints and record them individually. The waypoints can also be selected and edited in the map before takeoff:
1. Add Waypoints and Point of Interest in the map. The aircraft’s camera points to the Point of Interest when traveling through the waypoints.
2. Tap on the Waypoints and Point of Interest to set the altitude, flight speed, and other parameters.
3. Drag the Waypoints and Point of Interest to adjust the positions.
4. Flight speed, failsafe settings, and aircraft behavior can be configured after completing the Waypoints.
5. Waypoints and Point of Interest information can be saved in the app while editing in the map and the flight path can be recorded and repeated.
TapFly
TapFly features three sub-modes; Forward, Backward, and Free. Providing that lighting conditions are suitable, the aircraft automatically avoids obstacles it senses.
Forward: The aircraft flies towards the target with the Forward Vision System sensing obstacles.
Backward: The aircraft flies in the opposite direction of the target with the Backward Vision System sensing obstacles.
Free: The aircraft flies towards the target. The remote controller can be used to maneuver the orientation of the aircraft freely. The aircraft cannot avoid obstacles in this mode. Fly with caution.
Using TapFly
Ensure that the aircraft is in P-mode and that the Intelligent Flight Battery is sufficiently charged. Follow the steps below to use TapFly:
1. Take off and hover at least 1 m above the ground.
2. In DJI GO 4, tap , select TapFly, then select a sub-mode and follow the prompts
3. Tap on the target and wait for “GO” to appear. Tap “GO” to confirm the selection and the aircraft flies to the target automatically. A prompt appears if the target cannot be reached. If this is the case, select another target and try again. The target can be changed midflight by tapping the screen.
Exiting TapFly
Press the Flight Pause button on the remote controller or pull a control stick in the direction opposite to the direction of flight and the aircraft brakes and hovers in place. Tap the screen to resume TapFly. Tap or toggle the Flight Mode switch to S-mode to exit TapFly
Cinematic Mode
Tap in DJI GO 4 to select Cinematic mode. In Cinematic mode, the aircraft’s braking distance is extended and its rotation speed is reduced. The aircraft slows down gently until it stops, keeping footage smooth and stable even if control inputs are choppy.
Flight Modes
The DJI Drone has three flight modes, plus a fourth flight mode that the aircraft switches to in certain circumstances:
P-mode (Positioning): P-mode works best when the GPS signal is strong. The aircraft utilizes GPS and the Vision Systems to locate itself, stabilize, and navigate between obstacles. Intelligent Flight Modes are enabled in this mode.
When the Forward and Backward Vision Systems are enabled and lighting conditions are sufficient, the maximum flight altitude angle is 25°, the maximum forward flight speed is 50 kph, and the maximum backward flight speed is 43 kph.
Note: P-mode requires larger stick movements to achieve high speeds.
The aircraft automatically changes to Attitude (ATTI) mode when the Vision Systems are unavailable or disabled and when the GPS signal is weak or the compass experiences interference. When the Vision Systems are unavailable, the aircraft cannot position itself or brake automatically, which increases the risk of potential flight hazards. In ATTI mode, the aircraft may be more easily affected by its surroundings. Environmental factors such as wind can result in horizontal shifting, which may present hazards, especially when flying in confined spaces.
S-mode (Sport): In S-mode, the Vision Systems are disabled and the aircraft only uses GPS for positioning. The maximum flight speed is 72kph.
Intelligent Flight Modes are not available and the aircraft cannot sense or avoid obstacles.
Note: In S-mode, aircraft responses are optimized for agility and speed making it more responsive to stick movements.
T-mode (Tripod): T-mode is based on P-mode and the flight speed is limited, which makes the aircraft more stable during shooting.
The maximum flight speed, maximum ascend speed and maximum descend speed are 1 m/s. Intelligent Flight Modes are not available in T-mode.


