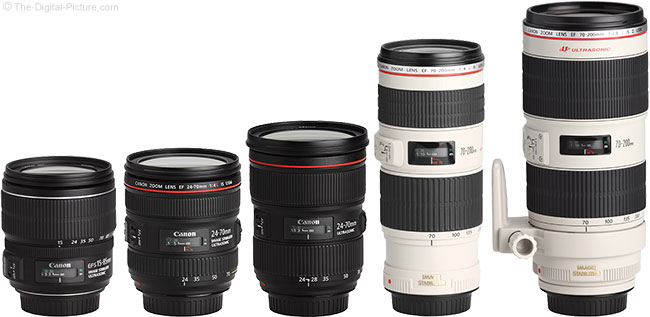
The purpose of this QuickGuide is to familiarize you with the variety of features available on Canon EF lenses so you can maximize how effectively you use them on Canon EOS system cameras. You may find it useful to have your EF lens(es) nearby as you review this information, to confirm what features they have and how these features function.
EF Lens Mount
All Canon EOS-system cameras are compatible with all Canon EF-mount lenses. If you are not sure whether your lens has the EF mount or not, check for an “EF” on the front of the lens, just before the focal length designation, and a red lens mount index dot. Align the red index dot on your lens with the matching lens mount index mark on your camera.
EF-S Lens Mount
Canon EF-S mount lenses mount only onto Canon APS-C type DSLRs such as the EOS 20D – 60D, 7D, and digital Rebel series. They are specifically designed for the smaller APS-C sensor and mirror and will not mount onto larger format cameras such as the EOS-1D and 5D-series. If you are not sure whether your lens has the EF-S mount, check for an “EF-S” on the front of the lens, just before the focal length designation, and a white lens mount index dot. Align the white index dot on your lens with the matching white index mark on your camera.
AF/MF Switch
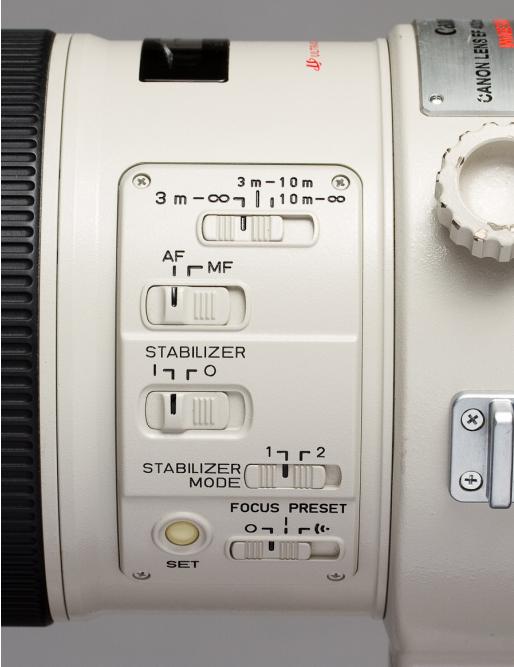
When this switch is in the Manual Focus (MF) position the autofocus motor is disengaged and the lens can only be focused manually. When this switch is in the Autofocus (AF) position the autofocus motor is engaged. The lens will automatically focus whenever you press the shutter button down halfway or when you press the AF Button on the back of your camera. On Canon lenses that have Full-time Manual Focus you can adjust focus manually, even when the lens is set to AF. The lens will have this feature if it is labeled “USM” and it has a distance scale inside a clear window on the lens barrel. If your lens has both, you can manually adjust focus when the AF/MF switch is in the AF position. Keep in mind, however, that if you subsequently activate autofocus it will override your manual setting. If you plan to use Full-Time Manual Focus, you may wish to use a Custom Function on your camera to make AF independent of the shutter button.
Focus Preset
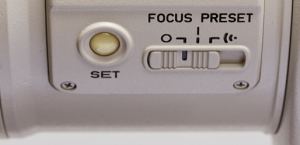
The focus preset feature is available on most EF super telephoto lenses. It presets a given focus distance into memory, so you can quickly recall it without having to re-focus. This feature is useful for sports and birding photography; for example, to allow rapid focusing on a goal or a nest where birds may perch. Focus Preset requires three controls: the Preset Switch, the Set Button, and the Focus Preset Ring. The Preset Switch has three settings: “Off”( O ), “On”( | ), or “On with sound”(). Pressing the Set button on the lens saves the current focus distance into memory. The Focus Preset Ring, the serrated metal ring immediately next to the manual focus ring, recalls the preset focusing point. To use this feature, you must:
1. Set the Preset Switch to “On” or “On with sound.”
2. Focus the lens to the desired distance.
3. Press the Set Button to register the distance.
You can then focus normally. A slight turn of the Focus Preset Ring will immediately shift focus back to your preset distance.
Focusing Range Limiter Switch
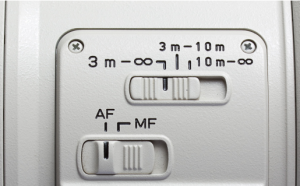
This switch limits the focusing range of the lens when the lens is in autofocus mode. Because the focusing mechanism in macro and super-telephoto lenses has a relatively long travel distance for, this feature helps shorten the autofocus time and reduce “focus hunting”. Most lenses have two settings: full-focus range (from minimum focus distance to infinity), and distant-focus range (from mid-way through the focus range to infinity). Some have three settings, with the third setting being near-focus range (from minimum focus distance to mid-way through the focus range).
Autofocus Stop Button
These buttons can be found on some super-telephoto EF lenses, evenly spaced around the front collar of the lens. To temporarily lock focus, press and hold any of these buttons. To resume autofocus, simply elease the button. Some newer bodies allow you to assign any of 5 or 6 other functions to this button.
Image Stabilization (IS)
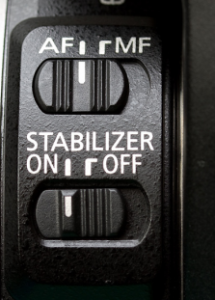
Canon’s IS technology detects camera motion and optically corrects it. With IS you can use shutter speeds 2 – 4 stops slower than you might otherwise, depending on the IS system built into the lens. (Remember that IS can correct only cameramotion, not subject motion. To stop subject motion you need a fast shutter speed.)Some IS lenses have only one operating mode: On or Off. Other Canon IS lenses have two IS settings: Mode 1 and Mode 2, where Mode 1 is for normal photography and Mode 2 is for panning. (Panning is when you use the lens to follow a moving subject during the exposure.) Some newer lenses, such as the Canon EF-S 18-200mm f/3.5-5.6, can detect whether the camera is being held horizontally or vertically and will automatically disable IS for the axis that’s parallel to direction of the pan.
Parfocal vs. Varifocal Zooms
Parfocal zooms stay in focus as you change the focal length. Varifocal zooms shift focus as you zoom. The vast majority of present-day AF zoom lenses are varifocal. This means that the old-school
technique of zooming to the maximum focal length, focusing, then zooming back out to a wider setting is not recommended. Instead, you should auto focus either as you are zooming (when using Servo AF) or after you have zoomed (when using One Shot AF).
Lens Care 101
Although you don’t need to pamper your lenses, you should keep them reasonably free from dirt, dust, and fingerprints. This is particularly important on the front and rear elements. To clean your lens:
1. Gently wipe off the exterior with a clean, lint-free cloth. Fully extend zoom lenses so you can wipe dust off the entire lens barrel.
2. Carefully blow off any dust or dirt on the lens surfaces with a blower brush or (very carefully!) compressed air.
3. Place a drop of lens cleaning fluid on a clean piece of lens cleaning tissue or breathe gently on the lens so that moisture condenses on its surface.
4. Gently wipe the lens surface from the edges toward the center, with a lifting rather than rubbing motion. A micro-fiber cleaning cloth is a good alternative to lens tissue and requires no lens cleaning fluid.
If you choose to use a UV or Skylight filter to protect the front of your lens, be sure it is multicoated on all surfaces. Non-multicoated filters can cause flare and veiling glare in your photographs. Also keep in mind that one of the most common causes of lens damage is from the camera and lens swinging from the end of a camera strap and into a hard surface. A Canon lens hood can absorb most of the impact and prevent damage while helping to prevent flare.
